Step-by-Step FPV Frame Assembly for Beginners
So You Want to Build an FPV Drone Frame
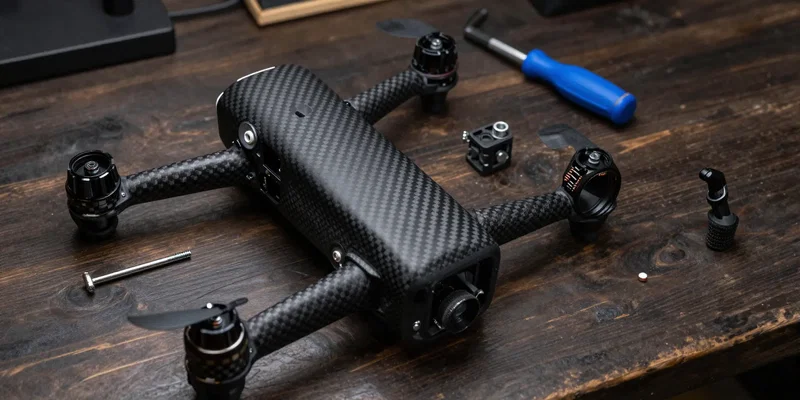
Let's get one thing straight. A DIY FPV frame isn't some mythical piece of aerospace engineering. It's a puzzle. A really cool, slightly expensive puzzle made of carbon fiber. You bought the kit. You stared at the pile of loose screws. Panic set in. Don't sweat it. Your first drone assembly is basically just bolting pieces of flying plastic and metal together. We're going to tackle this FPV frame build step-by-step. Grab your hex drivers. Clear off a spot on your desk. Let's build a drone.
Sand Those Edges (Seriously, Do It)
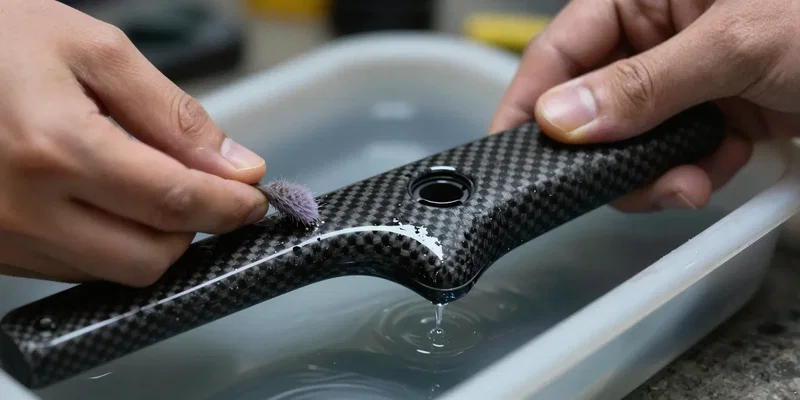
Here's the thing most tutorials skip. Freshly cut carbon fiber is sharp. Like, slice-your-motor-wires-in-mid-air sharp. Before you screw anything together, take a diamond file or some high-grit sandpaper to those edges. Run them under water while you do it so you aren't breathing in nasty dust. It takes maybe ten minutes. Actually, it's annoying. But skipping this step is how you short out a brand new build on a tree branch. Smooth edges save lives. Well, electronic lives anyway.
Laying the Foundation Without Losing Your Mind
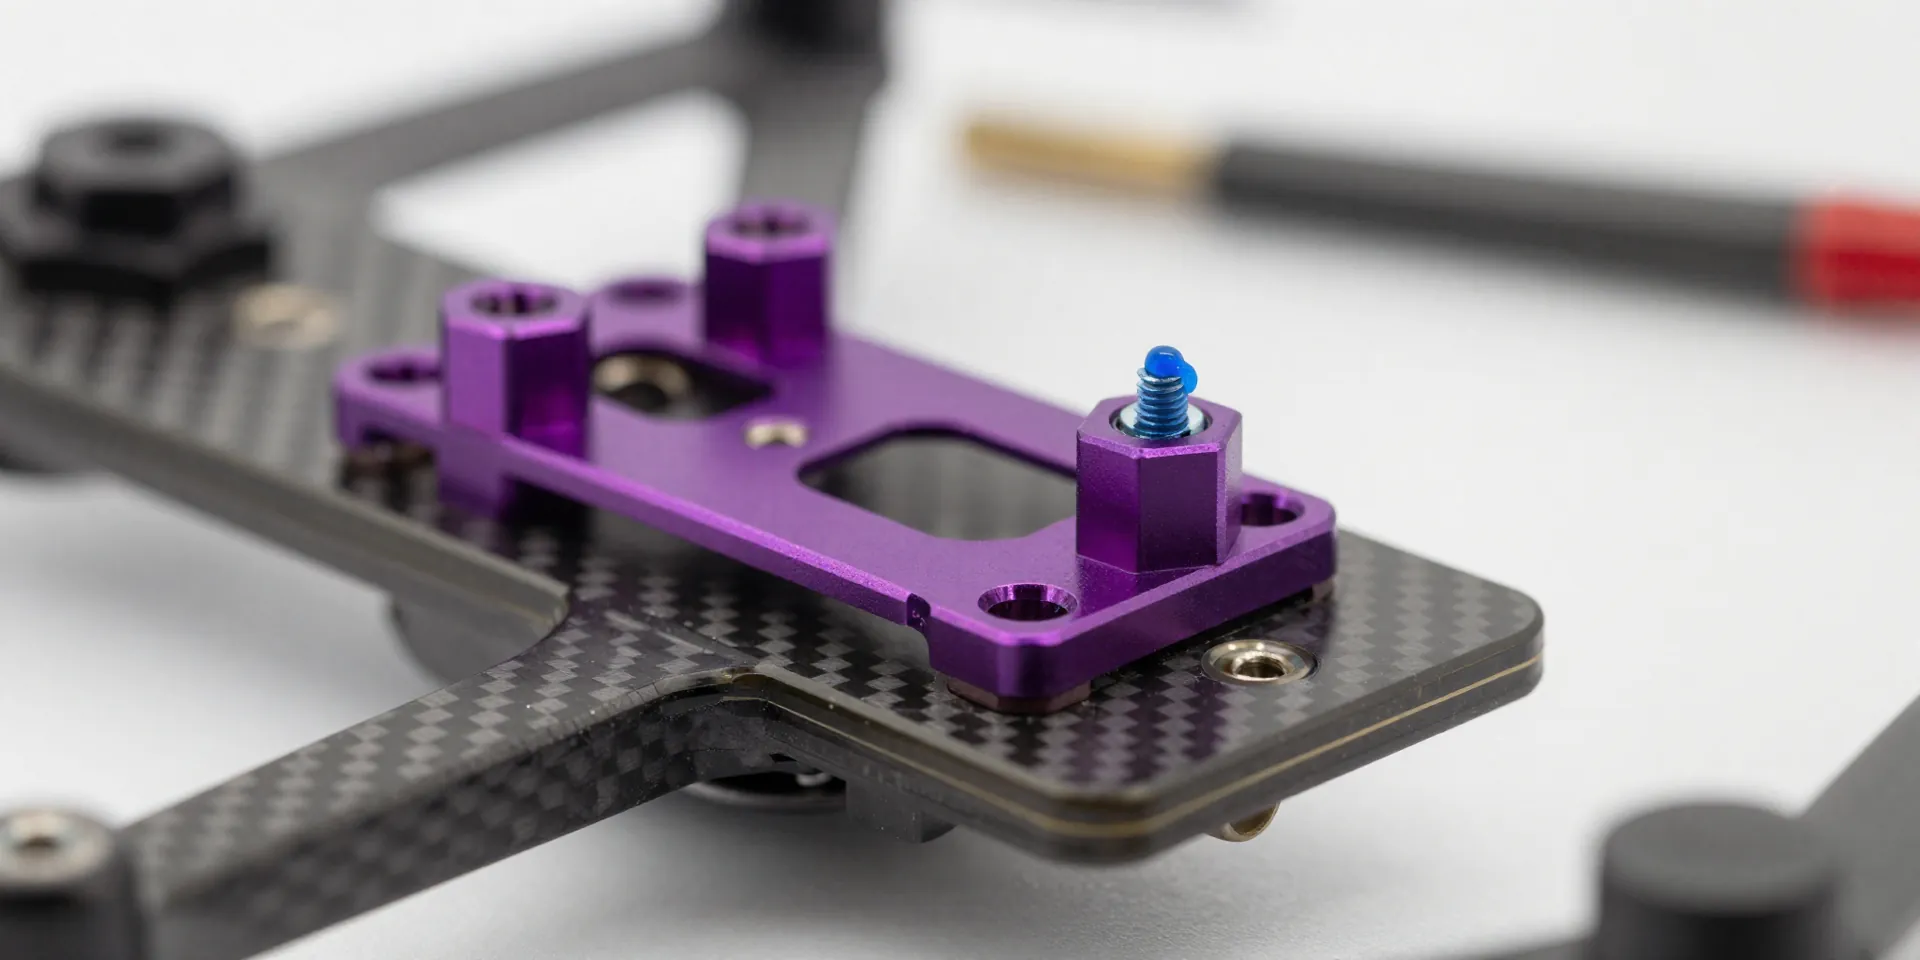
Time to start the actual drone assembly. Grab the bottom plate and your standoffs. Those are the little metal pillars keeping your frame from collapsing like a cheap tent. Put a tiny drop of blue threadlocker on your screws. Tiny. If you drown the threads, you'll strip the head trying to take it apart next month when you inevitably crash. Snug them down, but don't go full gorilla mode on the wrench. Carbon fiber is tough. Titanium screws are tougher.
Attaching the Arms (The Wobbly Phase)
This is usually where things get annoying. You're trying to sandwich four separate arms between the bottom plate and the mid-plate. Pieces shift. Screws fall on the floor. The cat runs away with a locknut. Standard DIY FPV frame stuff. Thread all the screws in loosely at first. Don't tighten anything down until all four arms are in place. Once they sit flat and form a nice, symmetrical X, crank them down tight. Wobbly arms cause jello in your video feed. Nobody wants that.
Slapping the Roof On
You're almost there. The top plate is the easiest part of this entire carbon fiber drone puzzle. Just line it up with the standoffs you mounted earlier and sink the last few screws. That's it. Pick it up. Give it a gentle twist. It should feel like a solid brick of spite ready to defy gravity. If it creaks, check your hardware. You just finished the frame. Now comes the real headache—figuring out where to solder all those wires.